Pages

Showing posts with label how'd I do that?. Show all posts

Thursday, October 27, 2011

Super fast and easy charming gift wrap job.

**Pardon the grainy photos..I used my old Generation-Whatever iPhone at work to snag these shots**...

I love fancy packages with beautiful gift wraps and ribbons and bows, but I have whittled down all of my gift wrap supplies these days. (smaller homes require creative thinking and more sensible purchases...) These days I have opted to go with a more neutral wrap job that can be changed with the color of tissue and the style of gift tag. I now use only brown craft paper (the kind you buy to mail packages in...) and I have a stash of two sizes of an oatmeal colored handled gift bag.
Yesterday I bagged up a gift for a friend that is retiring, and I wanted something charming and simple, but vintage looking and pretty. I got it all in about four minutes time. 

A bit of tulle, a strip of pale Robin's egg blue ribbon (My favorite! So yummy!) and a  hand written (with a fine point black marker)tea dyed manilla tag (I actually dye them in large quantities in a tub of uber hot instant coffee, and let them air dry on cake cooling racks.) Some matching blue tissue and a little sprig of milnery flowers from my collection finished it off.

If you keep your wrap supplies simple, and organized, it will be a snap to make any present look like a million bucks, and will make your recipient feel oh-so-special.


Sunday, October 2, 2011

Everything in it's place and a place for every thing.

...and if you can make it cute, all the better. (.....you can quote me on that.)

I think a long time ago I shared with you that I collect greeting cards when I find ones I like, and I store them  in a lil' basket so I am ready at a moments notice with the perfect card for the right person,at just the right time... but I never actually showed it to you.

It started years ago with me accumulating a few extra cards...and a few more...and...well, at some point in time I realized I had so many cards that I needed to actually file them by event, so I could find them as I needed them. You know, birthdays, Christmas, Blank, etc... and that has worked really well for me. When ever I see a card I like, I buy it and put it in my card file so I will have it when I need it.

That was the original plan anyway. (And we all know what they said about the best laid plans...)

Over time, I have gotten sloppy, rushing in and plopping the latest cards into the front of the basket, thinking I'd put it in the correct category it later. After doing this a million and six a few times, I managed to create a pretty unorganized basket of cards. Something needed to be done, and I decided that today was that day.

As long as I was going to the trouble to reorganize, I might as well update the look of my system, I thought. Seriously, I am so over the hot-pink-with-screaming-taxi-cab-yellow labels I had created in the early 90's (I think this must have been around the time I was busy puff painting over-sized Tee shirts and sporting really big hair...)
I decided to go with a simple look, using my favorite old typewriter font. I printed my dividers on manilla folders that I cut to be the size of a sheet of computer paper.
All I did was set up 2 columns in WORD, and printed my paper in "Landscape". I cut the paper in half once it was printed and I was ready to put them in place. Within a few minutes I was back to being organized, and it all looked clean, tidy, and cute.

Now, let's see if I can keep it this way.


Monday, August 15, 2011

Easy window valance tutorial....

Both of my daughters inherited my love of decoratin. One of them redid her upstairs guest bath last week, starting with a fresh coat of paint, and cleaning the window (which had a bit of birdie poop on it that required climbing out the second story window to clean properly...)
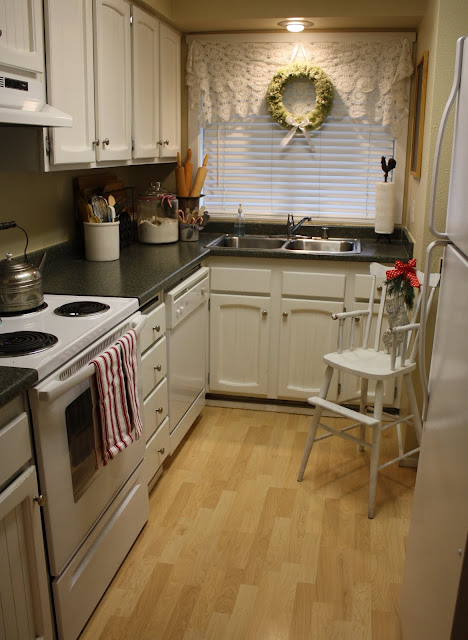
Anyway, once things were completed, she was looking for an easy window treatment. I mentioned the cute crocheted lace runner valance I had created in ten minutes in my Barbi Condo kitchen....

We decided to give the same treatment to her cute little bathroom window.
 She had a few pretty cutwork runners, and we chose one that was about two thirds longer than her window was wide. We hammered small finishing nails at both ends ot the top of the window frame,...
 as well as one last nail up top in the center, then we folded the runner in half, length wise, and hung it from the center nail..
then pulled the runner fairly taunt and hung it from either end on the outer nails..
We fluffed the ends of the runner so it hung neatly and we were finished. It added a pretty touch to her cute window, and still let plenty of light in. If you're looking for a quick valance treatment for a kitchen, bath or mudroom, you might want to consider your own version of this treatment idea yourself!


Saturday, August 6, 2011

A few well chosen words.

When you're entertaining, it's the littlest details that make things memorable. One of my favorite never-fail little details is so easy that I thought I'd share it here today.
 Whenever I am entertaining (or giving a gift, for that matter...) I google quotations for the event, or the person. For this past event I googled up love and engagement quotations. I found several that I liked, so I copied them in a simple font (courier) and printed them on a checkered background from my cheesy lil' print program.
I then cut them to fit in some of my simple black frames and added them to the buffet table...
It adds a bit of interest as well as color to the table, don't you think? It works just as well on gift tags, so remember this next time you are hosting a party or  wrapping a package!

Related Posts Plugin for WordPress, Blogger...